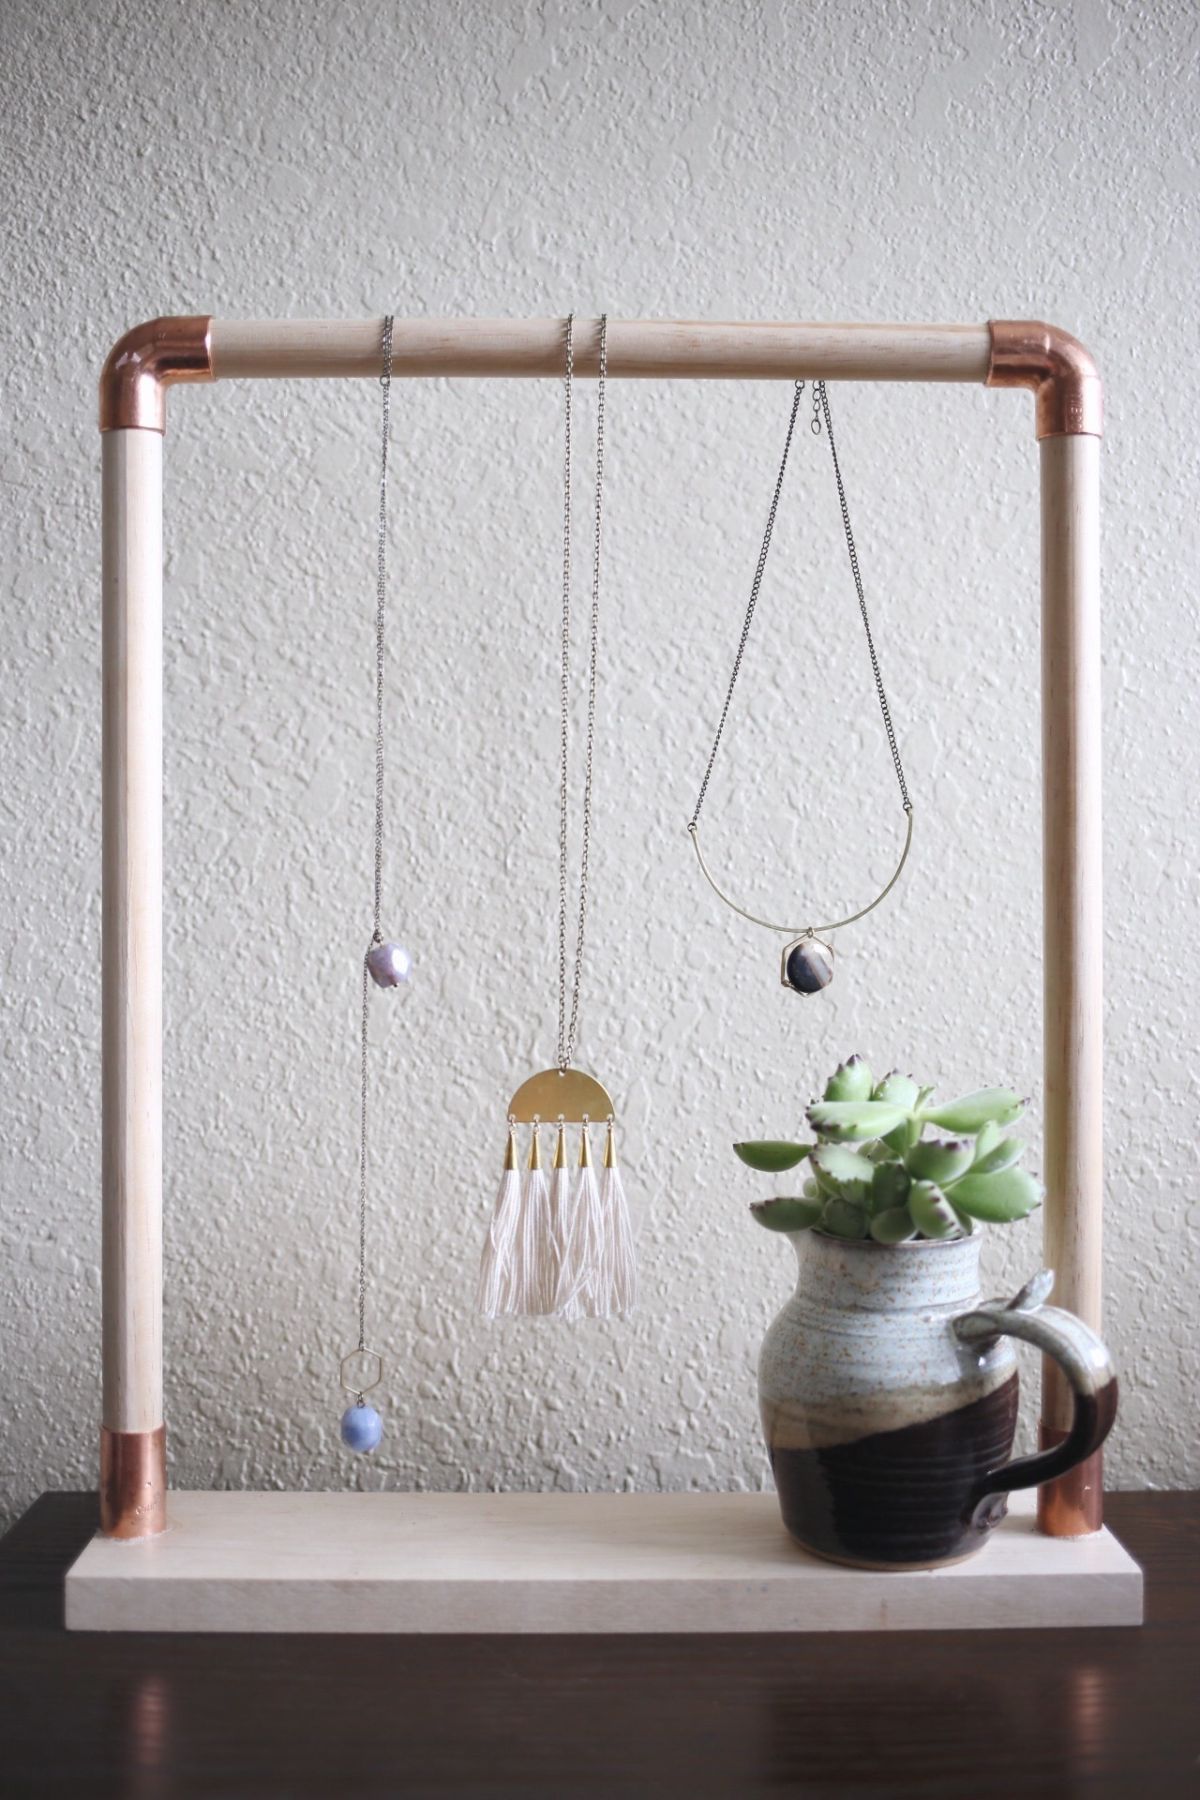
DIY Jewelry Stand From Wood Dowels and Copper Pipes
Looking for a unique way to hang and brandish your favorite jewelry?! Well, this project is just for you! This jewelry stand has a fleck of an industrial experience and price less than $20 dollars to make. Whats also great is that this project doesn't require any serious hardware tools–yous can visit your local hardware shop and ask them to precut the wood for y'all, so you don't have to practice all the extra work at dwelling house.
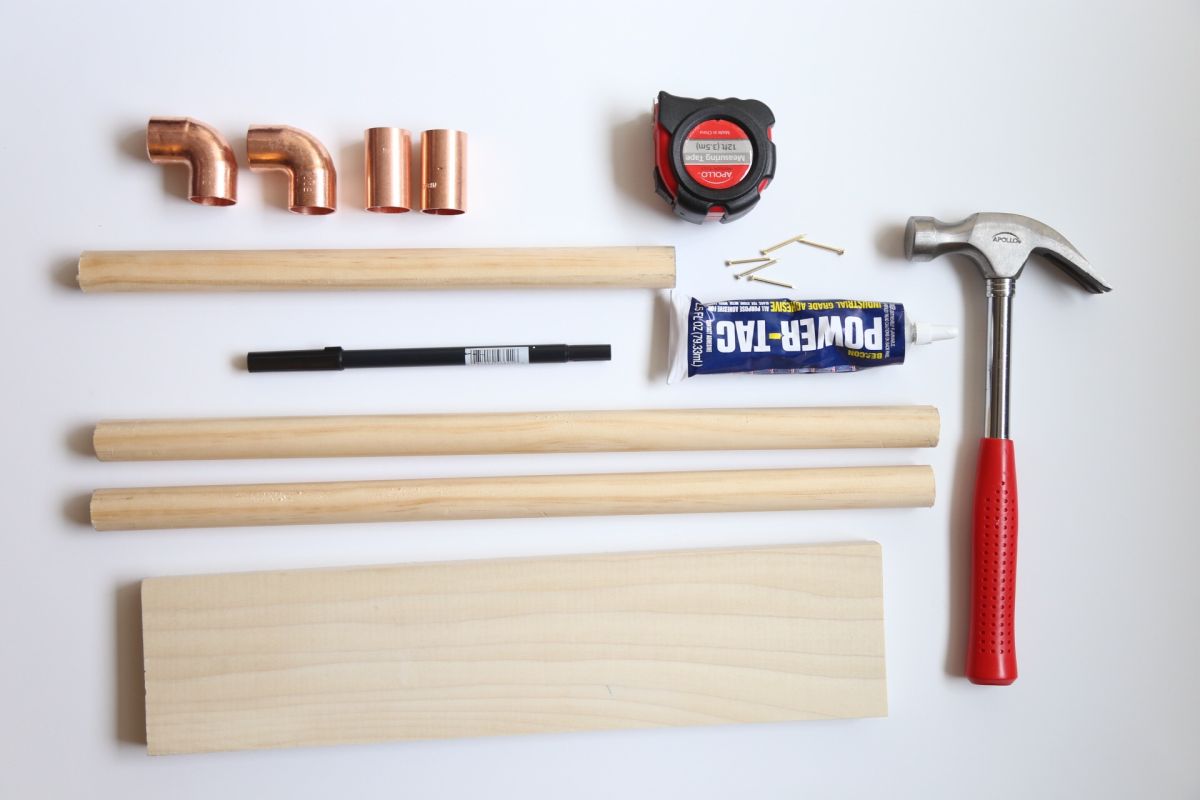
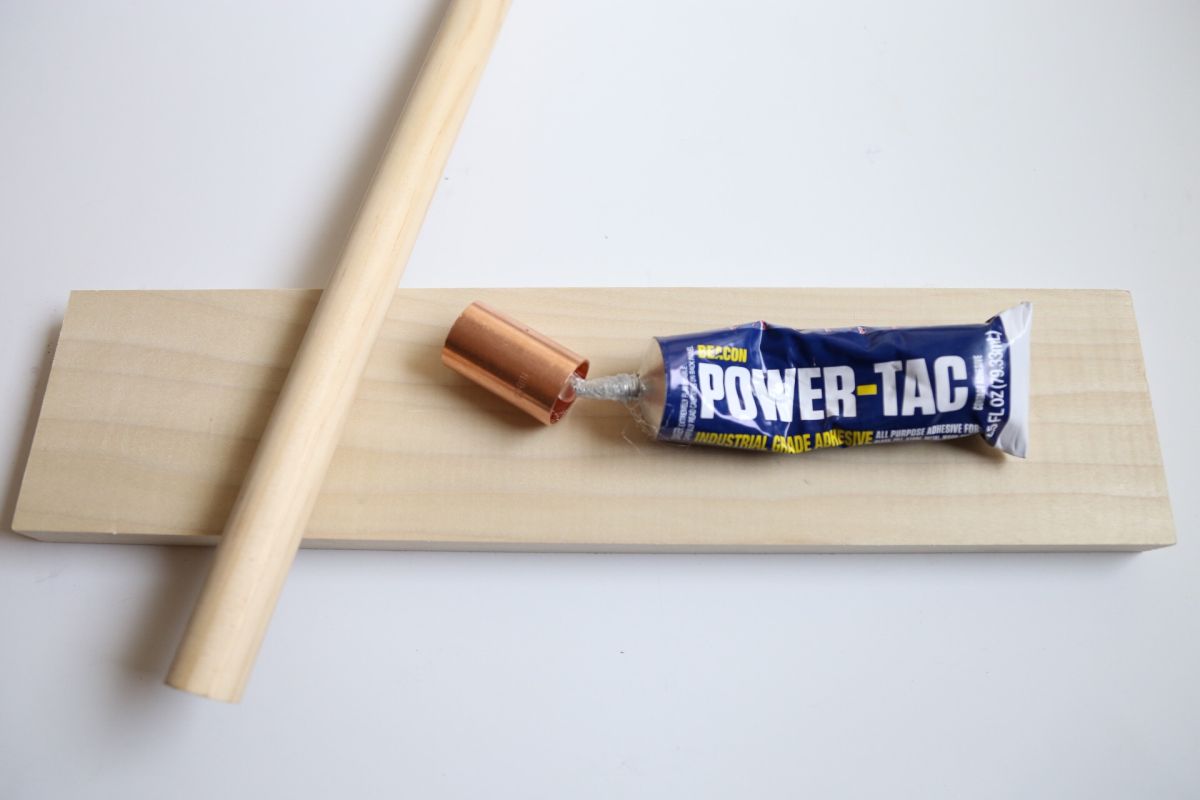
Materials you volition need to arts and crafts the jewelry stand:
- TWO 3/4″ 90-caste elbow copper pipage
- Two 3/4″ broad & 2″ tall copper pipe
- 12″ tall & iii/4″ wide wood dowel
- TWO 17″ tall & iii/4″ wide wood dowel
- 15″ wide & 3″ tall wood base
- pencil or mark
- industrial mucilage
- hammer
- measuring tape
- ane″ nails
- water bottles
How to make the Jewelry Stand – Stride By Step Guide
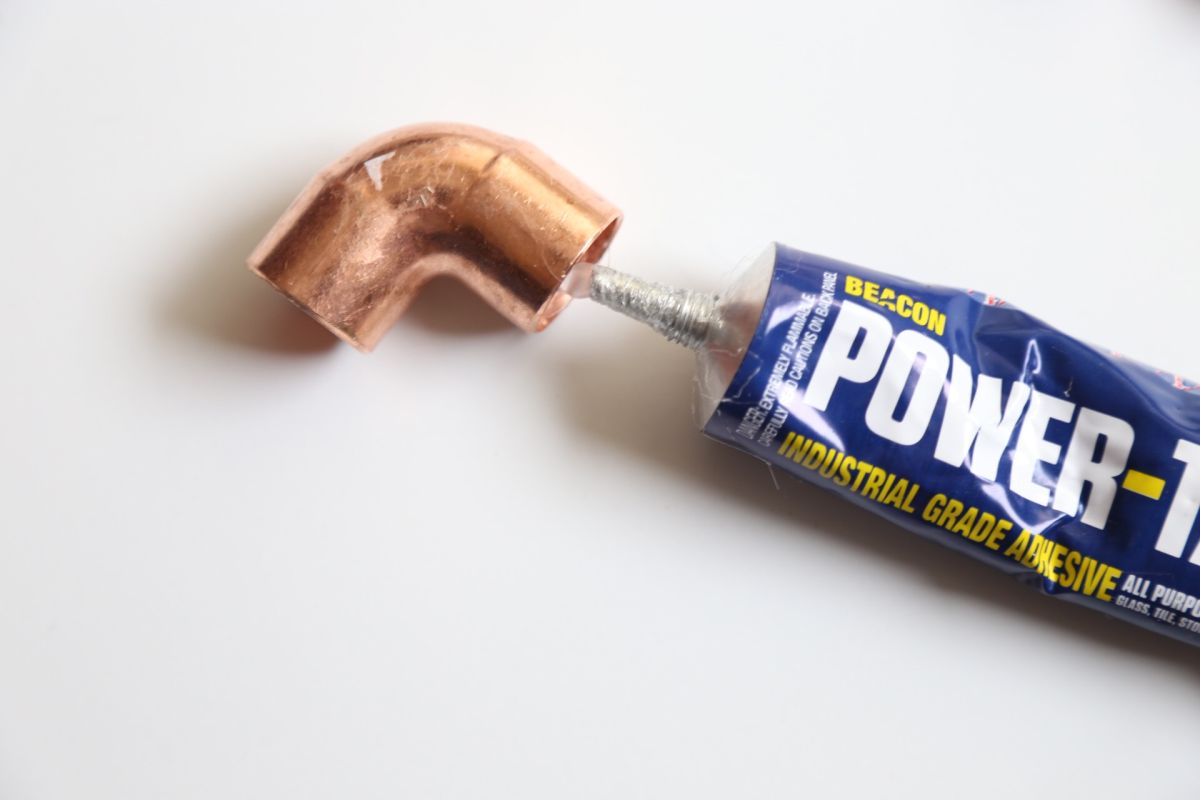
Step i: gum the 90-degree elbow pipe
Apply a adept amount of industrial glue within one of the sides of the 90-degree elbow pipe. Accept the other elbow pipe and do the aforementioned thing.
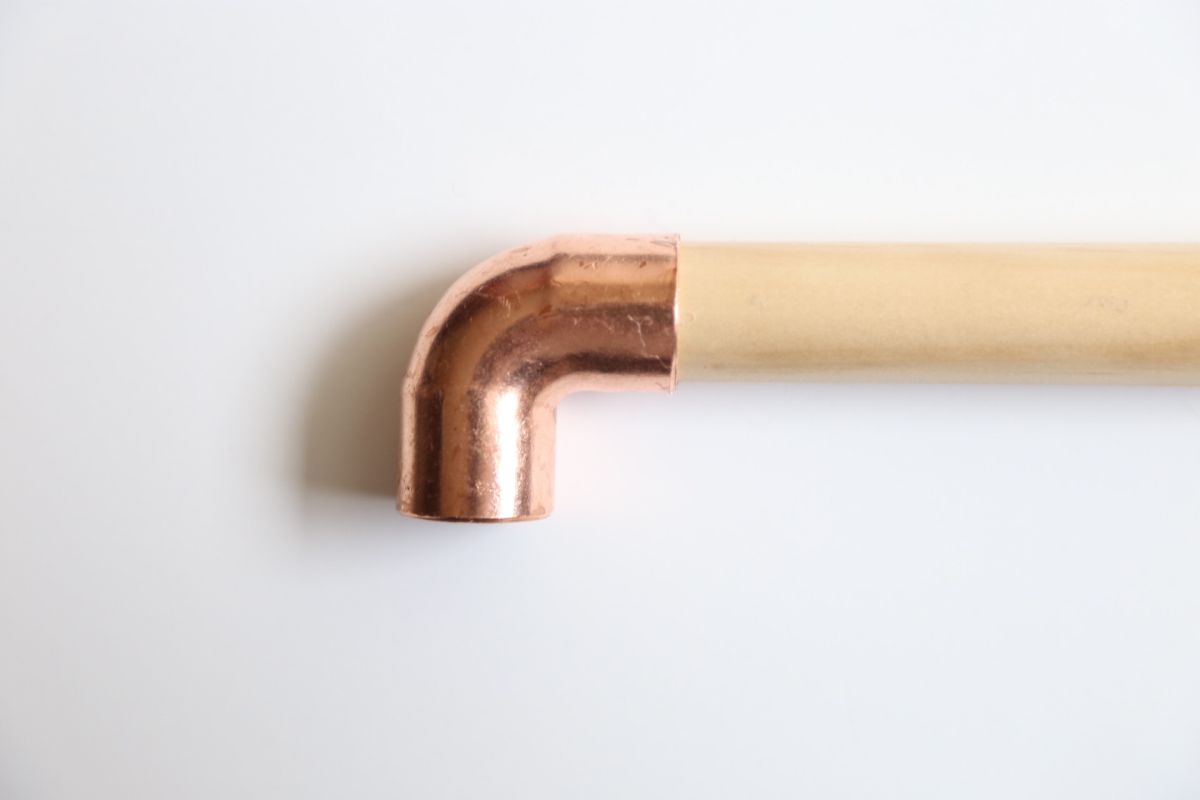
Pace 2: prepare the dowel an elbow
Attach both elbow pipes at the end of the 12″ wooden dowel. In one case you attached the pipes make sure both pipes are pushed all the way in, and let it sit for about 10 minutes before you lot move on.
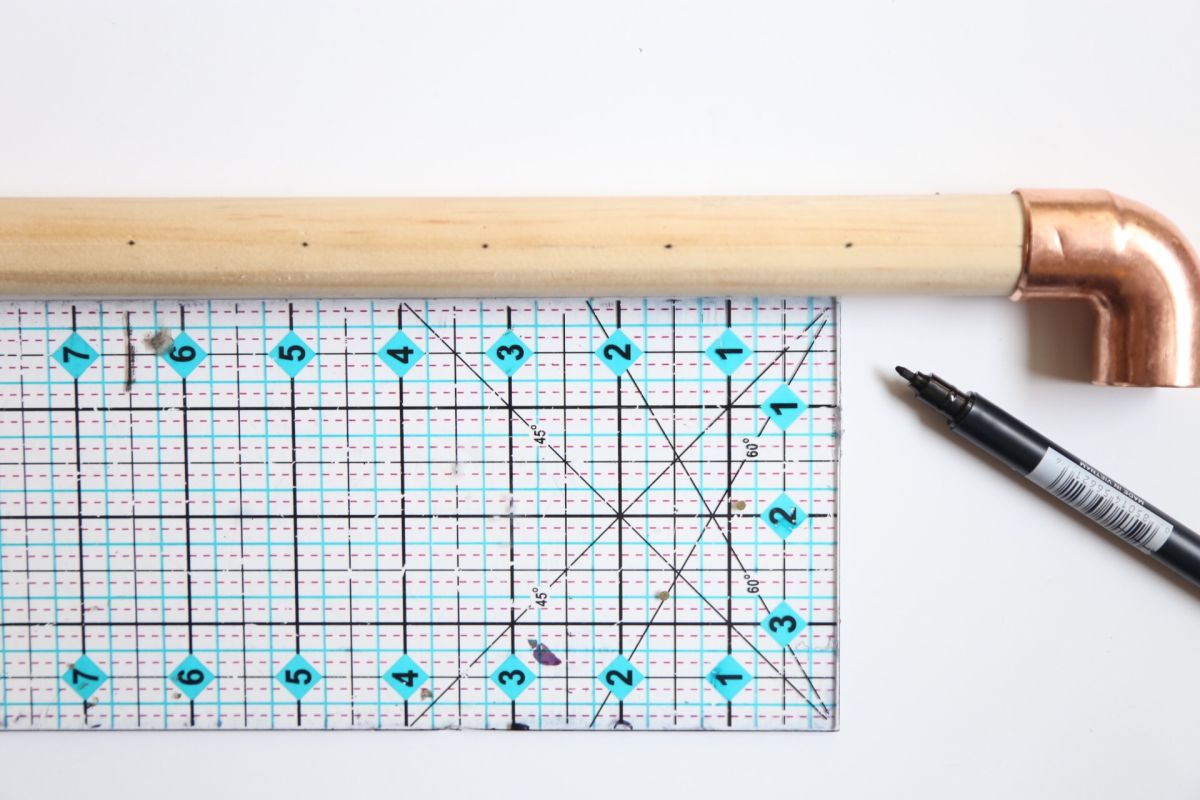
Step three: make up one's mind how many hanging spots you need
Make up one's mind on how many nails y'all want to attach to your jewelry stand. Mensurate out the spacing between each nail and mark each spot with a pencil. **For this project we attached 6 nails and it measures 1 1/two″ betwixt each nail.
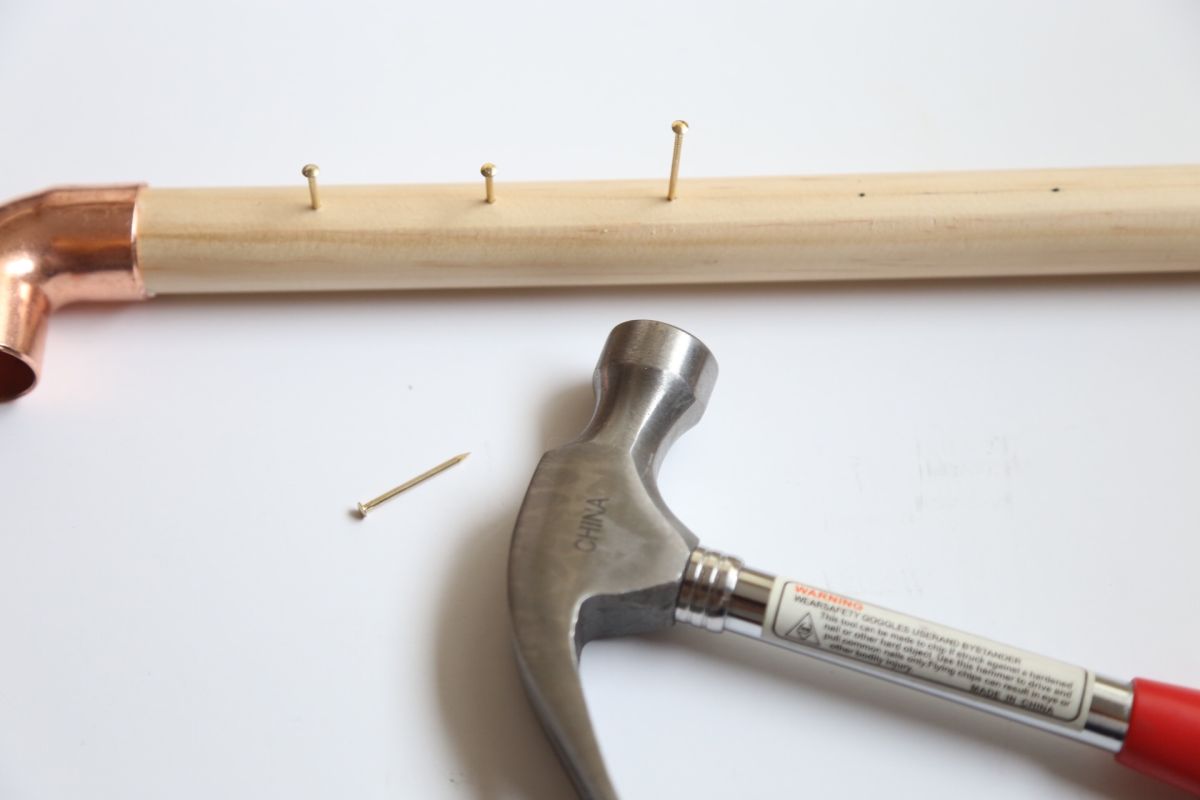
Stride four: hammer nails
Carefully hammer the nails on each marked spot. Make sure not to hammer the nail all the way downwardly, get out 1/4″ of the nail sticking out. Do the same with each marked spot and try to continue the boom height consistent.
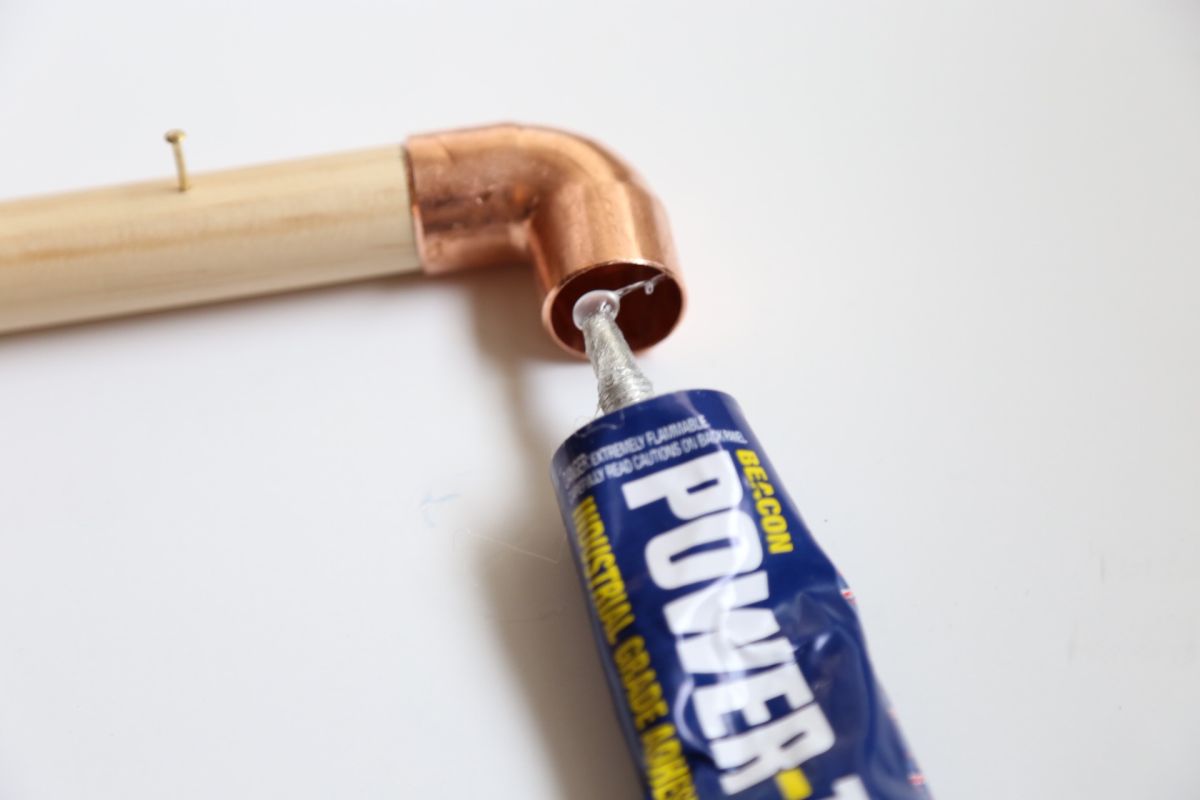
Step 5: Continue with the second corner
Use a good corporeality of glue inside the other terminate of the elbow pipe and immediately attach the end of the 17″ wooden dowel within the pipage. Do the same on the opposite side.
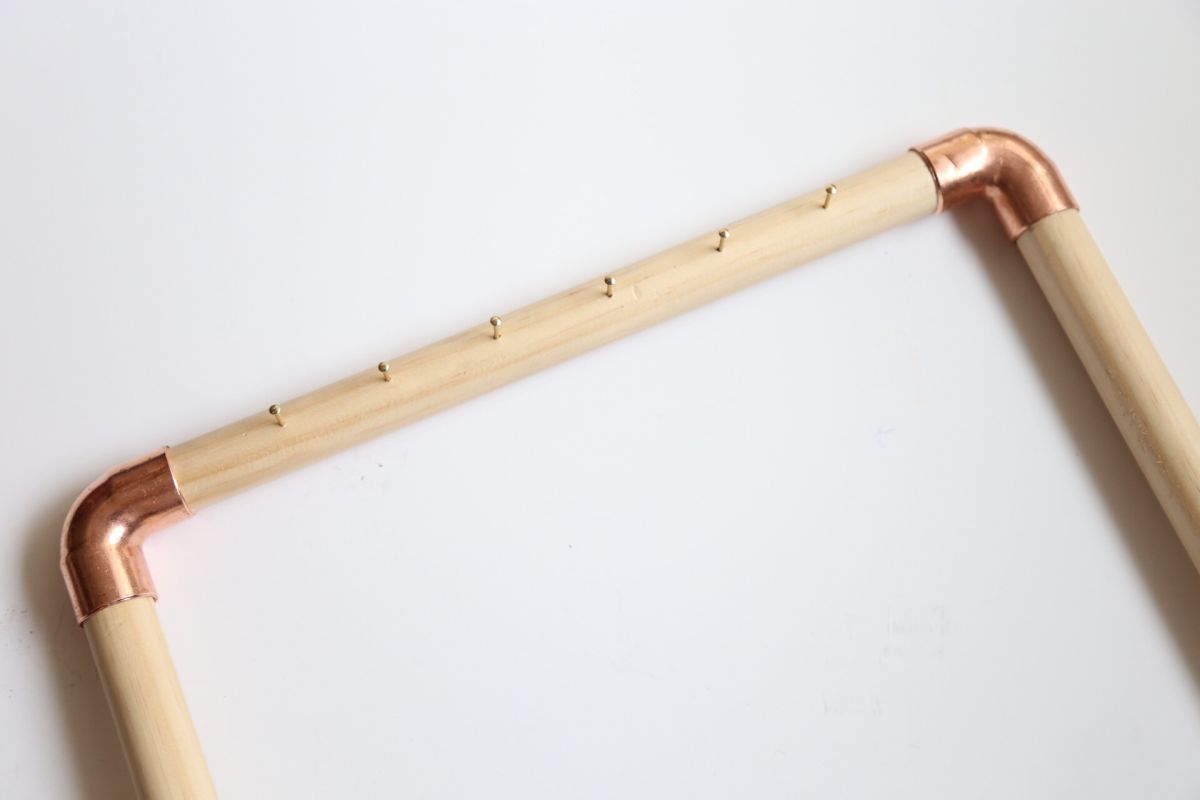
Step 6: let it dry
Once you have glued the pieces together, let it sit for well-nigh x minutes.
Step 7: Apply glue at the bottom
Apply a layer glue inside the two″ copper pipage and immediately identify the stop of the dowel through. Practice the same on the reverse side.
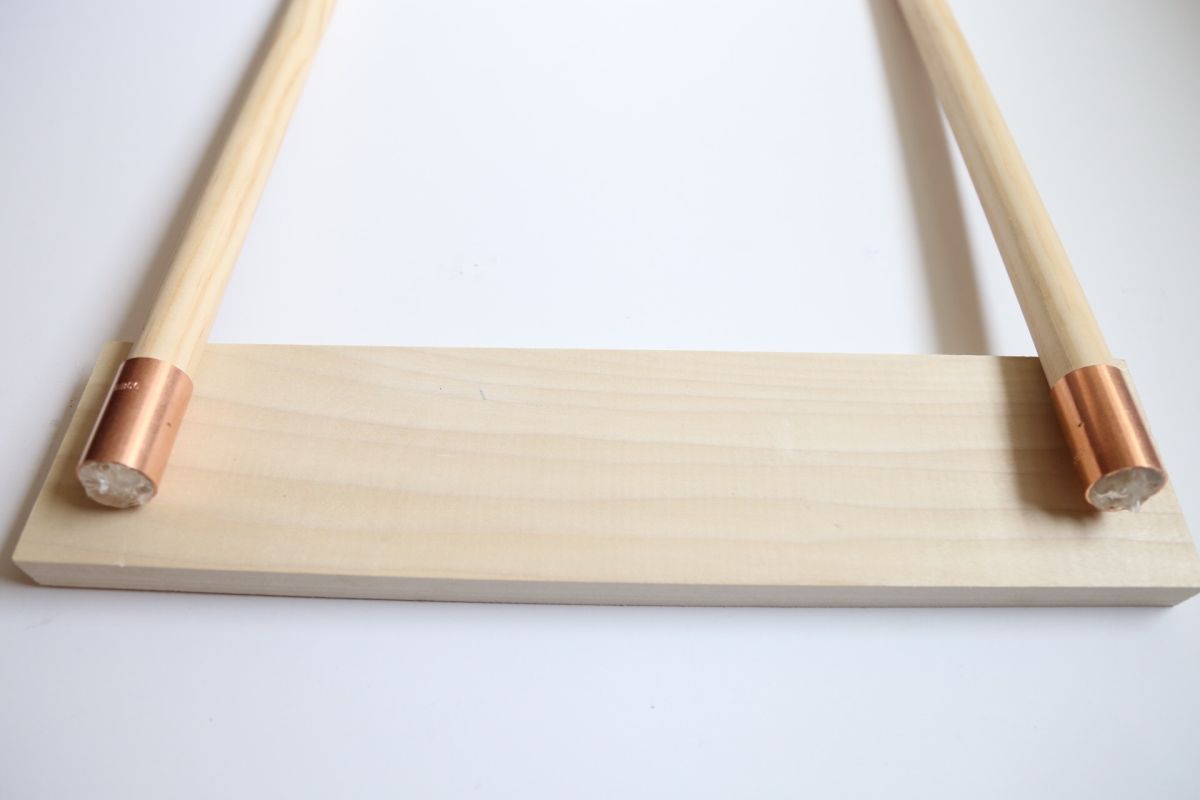
Step eight: Concur for a few minutes
Earlier you completely glue down the stand up, marking the middle of the wooden base. Apply a thick layer of glue at the end of both dowels and attach the ends of the dowels to the wooden base. Concur the wood dowels upward for a couple minutes.
Step 9: leave it for completely dry out
To ensure that the stand up does fall, place full water bottles on the sides of the dowels to keep it standing every bit the mucilage dries. Depending on the industrial glue, it tin can take about 4-x hours for the glue to completely dry out.
Conclusion
Once your stand has dried your all ready to hang your beautiful jewelry on your new handmade jewelry stand up. Promise yous enjoyed this projection! Happy crafting!
bloodworthbeids1961.blogspot.com
Source: https://www.diys.com/diy-jewelry-stand/
0 Response to "DIY Jewelry Stand From Wood Dowels and Copper Pipes"
Enregistrer un commentaire